Friday 24 October 2014

The best oats porridge you will ever eat!


I love oats porridge! I know it is not every ones cup of tea, but for me, it is the ultimate breakfast indulgence! Warm, creamy, healthy goodness in a bowl! I have been making this for Bump and I for breakfast just recently and he LOVES it!!! Makes my heart very happy :) So, if you want to make the the best tasting oats you have ever had....here is my recipe:

You will need:
1/2 cup oats (quick cooking or whole rolled oats - whole rolled will just take a little longer to cook) 
1 cup boiling water
2 T raisins or sultanas
1/2 cup milk
Medium sized apple grated (you can peel or not peel before grating)
1/4 tsp cinnamon 
Brown sugar or honey to taste (If you are going to feed this to your little one, PLEASE DO NOT ADD HONEY unless they are a year old!!! Although rare, honey can contain spores from the bacteria Clostridium botulinum which can make your baby very ill!!)
1 tsp peanut butter (a generously heaped teaspoon...or tablespoon....your call!) 

In a medium saucepan put the grated apple, oats, cinnamon and the raisins or sultanas. Pour over the boiling water. Add the milk and stir the mixture. Cook on a medium to high heat, stirring frequently until the oats are soft and creamy (the quick cooking oats took under 5 minutes cooking on gas).
Stir in the peanut butter and sugar or honey (if you are using) while the oats are still hot. 
Now you can sit down and enjoy! (Obviously allow to cool down before feeding to your little one - the raisins can stay hot for quite some time after being removed from the heat). 
This recipe should make enough for you and your little one. Hope you enjoy!

Keep smiling!
Jax


Tuesday 21 October 2014

Easy peasy girls skirt


KCWC day one:
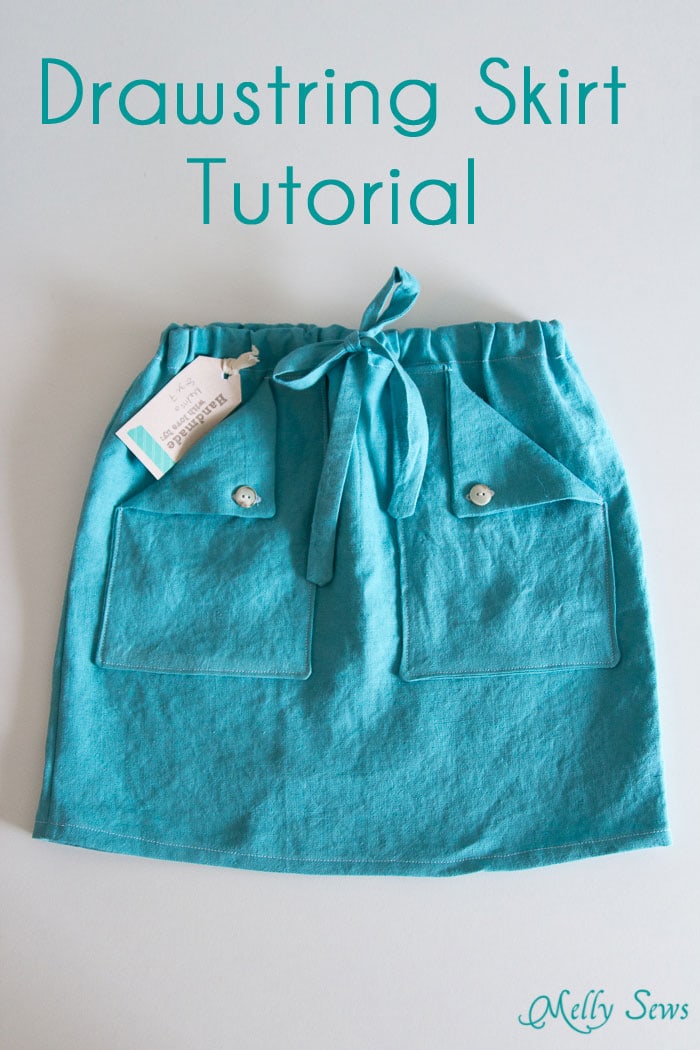
So I am super impressed with myself! I actually finished the little girls skirt I spoke about in this post! I am very good at starting sewing projects but not that good at finishing them all the time! Well to be fair to myself, it is usually only when something goes wrong that I don't finish...it will get scrunched up and thrown in the cupboard to be finished at a later date when I am less likely to take a pair of scissors to it in frustration! I was following a drawstring skirt tutorial from Melly Sews and got frustrated trying to make a buttonhole for the drawstring on my machine (for some reason it was stitching horribly!!) so instead of my usual stunt of throwing it in the cupboard I took a time out with a cup of rooibos tea and then decided to scrap the drawstring idea and just elasticate the whole skirt. I love how it turned out. It was a super easy (free!!!) pattern/tutorial to follow and the bonus is that the sizes go from a 2T to a 16 year old! Fabulous! I only wish I would get to see it on the little girl that I made it for. I made it to put into my Santa Shoebox for a little 2 year old girl called Lihle. It is such a wonderful, worthwhile cause and such fun to do! I will post about the project and the shoe boxes that we did as a family this year soon! But for now, time for some much needed sleep!

Keep smiling,
Jax

Signing up for Kids Clothes Week Challenge, October 2014


Okay so I must be crazy... I signed up for the Kids Clothes Week Challenge yesterday!! It is something I have been wanting to do for ages, but never get around to doing or don't find the guts to try. So this time I have just dived in! No excuses, (and no preparation either !!!) but I am going to have a go! This is probably going to be one of my busiest weeks as it is Bumps first birthday party on Saturday... So much to do!!! But hey, I am sure I can fit in an hour of sewing every day of the week in amongst the housework, cooking, looking after Bump and party prep!

So the first thing I desperately want need to sew is a little girls skirt for my Santa shoebox which I need to deliver on Thursday this week too (just to add to the chaos!)! But at least that can count towards my hour sewing even if it is not actually for my child right? This is the pattern I want to sew:

Sew an easy drawstring skirt in any size with this tutorial - Melly Sews


Is it not gorgeous? The pattern and tutorial is from Melly Sews. It looks pretty straight forward and it will give me an excuse to try my hand at french seams, another thing I have been wanting to try out.
Well wish me luck!! Time for me to get stitching!!!

Keep smiling!
Jax

Wednesday 23 July 2014

Appliqued onesies

So I know I have been quiet on the blogging front for a few weeks, but I have a good excuse... I have been appliqueing up a storm of onesies! Oh and getting very distracted by our Bump who has started crawling now and pulling himself up on things and generally just getting up to adorable mischief (he climbed into the dishwasher the other day!!!). He just melts my heart. Especially when he squeals with delight and charges on all fours after his furry brothers (cats), Jack and Zarkie. Good excuses for not blogging hey?

I love appliqueing onto onesies, there is something about them that just gets my creative juices flowing and calms my soul late into the evening while I blanket stitch around the designs and everyone else sleeps. I can feel myself start getting restless if I have not had a chance to do some stitching for a few days...maybe it is because I know I have orders waiting to be filled :)

So do you want to see what I have been up to? Here goes....


This hippo with the pink balloon tied to her tail is one of my favourites of a recent order I did. It appeals to my quirky side! And I love how the bright pink polka dot rhino onesie turned out! Who doesn't love a rhino? Or an elephant blowing hearts out of its trunk? ;)


The above two were also part of the same order. The poor owl looks a little startled but I love how she turned out just the same. The fabric that I used for the giraffe was originally ear-marked to make a little girls dress, but I could not resist pinching a few centimetres to use for this giraffe. I hope I will not regret it when I finally get around to sewing that dress!


These are more of my favourites. The bear was inspired by this quilt. I originally made Bump one like the blue one and loved it so much that I even made one in pink and made this one to sell (you can check out my Facebook page Handmade by Guppy). The lion was originally going to be for Bump, but I took so long to finish stitching it, that he had almost grown out of that particular size (8-10 kg), and so I decided to sell it. So now I owe my boy a lion onesie or shirt in a larger size! I really love how this lion turned out!


 These are a few more of my most recent appliqued onesies. I have already sold the turquoise rhino striped onesie. It was my absolute favourite!!! Well I hope you have enjoyed seeing what I have been up to lately. I will try to not take so long to post again :)

Keep smiling,
Jax


Sunday 6 July 2014

Make your own baby food: carrot purée


Bump really enjoys carrot purée (and thin slices of carrot if I am patient enough to slice them thinly and cook them until they are super soft) 
Making your own carrot purée for your baby is really easy! What I usually do, is I cook extra carrots when I am preparing them for dinner for my husband and I, then it does not feel like extra work.

So to make your own carrot purée:
You can cook as much as you like as it freezes well. I wash and peel the carrots and then slice fairly thinly (I aim for about half a centimetre in thickness or less, but rarely achieve perfection.., my knife skills are lacking). The reason that I want them thin, is they cook faster and are easier for Bump to eat should he want some whole. I rinse the carrot slices with boiling water and then steam until  tender. Steaming carrots can take some time if you steam using a colander over a pot of boiling water with a lid. However, steaming is well worth the wait! The carrots just taste so much better than when they are boiled. I put it down to steaming keeps all of the delicious goodness locked in! If you are lucky enough to have an electric steamer, please feel free to use it!

Once the carrots are tender, dish up what you are having for dinner and then purée the remaining with a blender for your Bub. You can thin the consistency out with boiled water, breast milk or formula. However, if you are freezing the purée, I would not recommend thinning it out until after defrosting.

Well, there you go! Could not be easier! Hope your little one enjoys!

Keep smiling,
Jax

Friday 27 June 2014

Make your own baby food: Pear and apple purée


Buying baby food puree's for every meal can end up costing a small fortune! Buying is super convenient, but spending  30-60 minutes once a week to prepare food is all you really need, to do it yourself. Making baby food yourself is really easy too! I make this apple and pear fruit purée for Bump which he loves!

Ingredients:
3 medium sized washed red apples
3 medium sized washed ripe pears
1 cinnamon stick or a generous pinch of ground cinnamon (optional)
Boiled, cooled water

Method:
  1. Peel and core the apples and pears. Cut into thin slices (You can roughly chop or cut the slices thicker, it just cooks quicker, the thinner the slices). 
  2. Place the sliced fruit in a colander and rinse with the boiled, cooled water. Place the fruit and the cinnamon (if you are using it) into a pan. Cover the bottom of the pan with water so the fruit is slightly submerged (it is better to use a smaller pan as you use less water).
  3. Simmer, covered for approximately 10 minutes until the apple and pear are soft. Drain the fruit, reserving the liquid. Purée the fruit with a blender. I use a stick blender. Use the reserved liquid to thin out the consistency of the puree if neccessary. Any remaining liquid can be diluted 1:1 with boiled, cooled water and given to your little one to drink provided they are over 7 months old.
  4. This freezes well. I freeze in cleaned, sterilised glass jars (used Purity bottles) or in ice cube trays.
FYI: Please note that it is often recommended that purees be passed through a mesh sieve to make the puree very smooth. I have never done this for Bump, as I do not own a sieve! He has been absolutely fine without sieving! In addition, his paediatrician recommended that he started rice cereal 4 months (very watery consistency) and then progressed to vegetable purées at 5 months. I was told to only introduce fruits and fruit juices (diluted 1:1 with water) at 7 months and meat and eggs also only from 7 months. I was also told to start off with very smooth purées and slowly increase the texture of the purées as this helps with speech development later. It is a good idea to feed the same food for four days in a row when first introducing it, to  ensure your little one has no allergies to the food. 

Well I hope you feel inspired to make your own baby food and that your little one enjoys this apple and pear purée

Keep smiling,
Jax

P.S. My apologies, I forgot to mention how much this recipe makes! I ended up with 4 servings of 125 ml and approximately another 60 ml or so.

Thursday 26 June 2014

Glitter and bead bottle toy


Hi there! Ever wished you could whizz up some quick, easy, budget-friendly  toys for your little one? Yes? Well then this is for you! I made Bump a bottle filled with water, beads, glitter and sequins. I based it on 'the ocean in a bottle' in this post.  My first attempt did not work out too well.... For some reason the oil made everything opaque and look dirty... It was a water-oil emulsion that didn't want to separate out again. Plus I had made it in a 500 ml plastic water bottle, which ended up being too heavy for Bump to hold with one hand once the water and beads were in. So, I attempted a second one. This is how I made it:

Materials:
Small empty plastic bottle (I used a travel-size mouthwash bottle), labels removed.

Glitter.

An assortment of different coloured and sized beads and sequins (if you are anything like me, you will have no problem finding these items in your vast craft stash!).

Food colouring (this is optional. I decided to not use food colouring after using too much in attempt number one).

If you have any small plastic toys like animals or army men, it might be fun to put those in too.

Boiled and cooled water, or water left over from sterilising bottles (my theory on using this water is that over time, you will not get stuff growing in your bottle! I hope I am right!)

Superglue to stick the bottle lid on.

Directions:
  1. Fill the bottle 3/4 full with water (you can do more or less depending on the effect you want).
  2. Add in your beads, glitter (and toys and food colouring if you are using them).
  3. If you want the bottle to be full, add more water. 
  4. Put the lid on and test the bottle out. Shake it up and see the beads etc. settle. You can make adjustments - add more or remove depending on your taste.
  5. If you are happy with how the bottle and its contents look, dry the inside of the lid well and the thread on the neck of the bottle. Put a few drops of superglue on the thread and screw the lid back on. Leave it to dry for as long as the superglue instructions recommend. You absolutely MUST glue the lid on! You do not want your little one opening a bottle filled with potential choking hazards! Even with the lid glued, I would still recommend that you do not leave your little one playing alone with the bottle.
A really awful photo (my apologies!!) of how the bottle turned out.


Bump loves his! It is great for distracting him when he is being strapped into his car seat (he hates that process!). He stares at it, shakes it about and then watches everything settle. I pop it in his nappy bag when I go out with him so that if he needs distracting, it is available! He also loves to chew the lid and shake the bottle as it makes noise. 

Bump playing with his bottle. I know I am biased as I am his mom, but isn't he just gorgeous? 

I would love to see how yours turn out!
Keep smiling,
Jax